HMI for pool automation with Raspberry Pi
This is a tutorial for an outdated version of the REX Control System. Please follow the up-to-date Getting started guides listed below:
The previous tutorials covered the process of creating the control algorithm for pool automation and running it on your Raspberry Pi. Although the development tools of the REX Control System allow you to control Raspberry Pi over the network, a typical user needs a much simpler way to interact with the control algorithm. Leaving the physical pushbuttons aside, the most viable possibility is a web-based HMI (Human Machine Interface), which will allow you to control your pool with your tablet or smartphone via your home wifi network.
The RexHMI components
For the mentioned purpose a set of programs and libraries is available, forming the so-called RexHMI family together. This tutorial will guide you through setting up the individual components.
The overall structure of RexHMI is shown in the following picture. RexHMI is based on HTML5 web pages, which are supported by modern browsers. The Lighttpd webserver provides HMI webpages via standard HTTP protocol. When the page is loaded in the browser the WebSocket connection is established between the page in your browser and the RexCore runtime core running on the Raspberry Pi. The Lighttpd webserver and RexWSTcp websocket server act as interpreters between the user and the control algorithm. This allows the user to easily monitor and adjust selected signals and parameters of the running control algorithm. 
Running the control algorithm for pool automation
- First download the project files from our GitHub repository. It is most convenient to download the whole repository of examples in the form of a standard .zip file. The files are located in the RaspberryPi_examples\03_PoolAutomation folder. If you are familiar with Git and GitHub server, you will probably use the direct link to the REX Control System examples repository.
- You already know how to run the control algorithm on your Raspberry Pi, don't you? If you need a hint at this moment, visit the introductory tutorial on using the REX Control System on Raspberry Pi.
- Connect to your Raspberry Pi using the RexView diagnostic tool and check that the control algorithm is running. Unfold the tree view of the running algorithm and you must see all the function blocks which are included in the project.
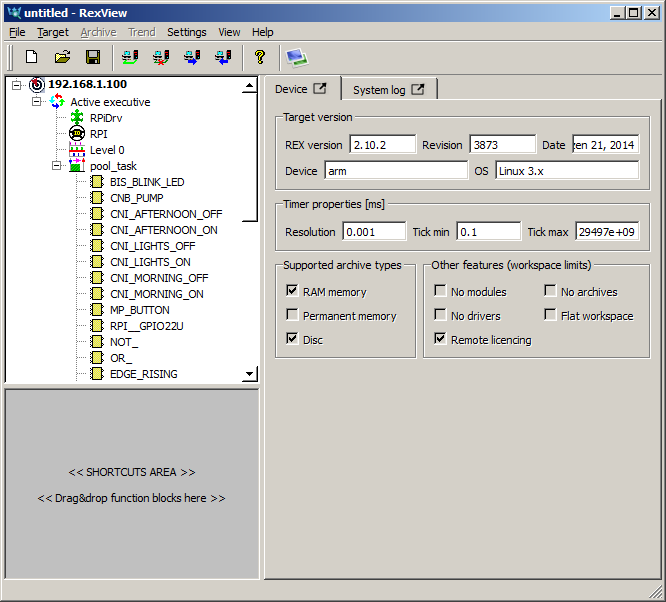
- Now when the control algorithm is running, it is time to install the components necessary for RexHMI to run.
Installing RexHMI components on your Raspberry Pi
- You already installed the webserver and websocket server while running the installation scripts, therefore you can dive right into work.
- If you are running another webserver on your Raspberry Pi, e.g. Apache (LAMP) server, you will need to change the default port of the Lighttpd server from 80 to e.g. 8008.
Running your first HMI
- The RexView on your PC is still connected to the Raspberry Pi, right?
- From the menu, select Target->PC to target device.
- In the dialog select Visualization (HMI) and browse for the HMI subfolder included in the project.
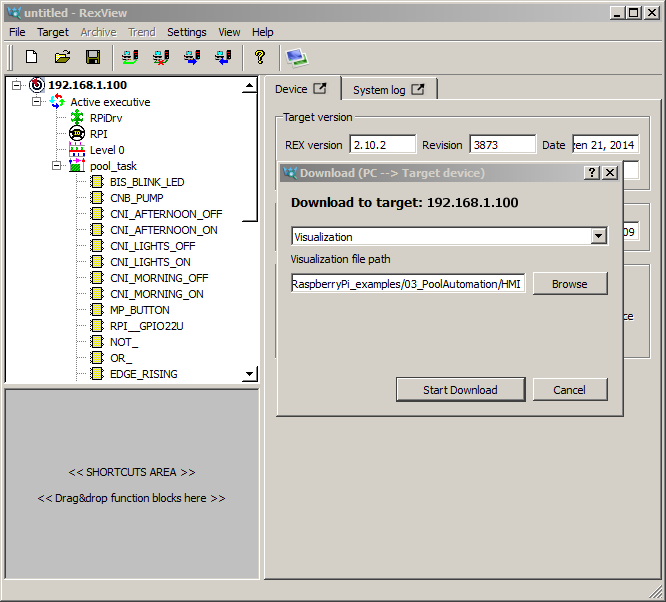
- Click the Start Download button and wait for the files to download.
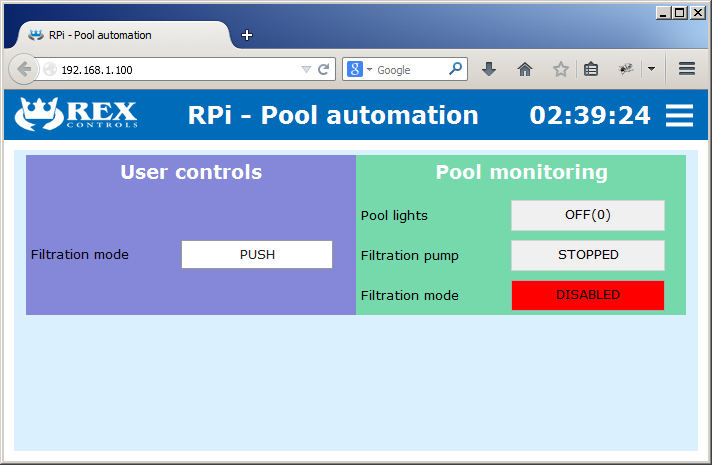
- As soon as the HMI files are copied to the Raspberry Pi, you can view the HMI in your browser - simply type the IP address of your Raspberry Pi into the address bar. You should see something like this:
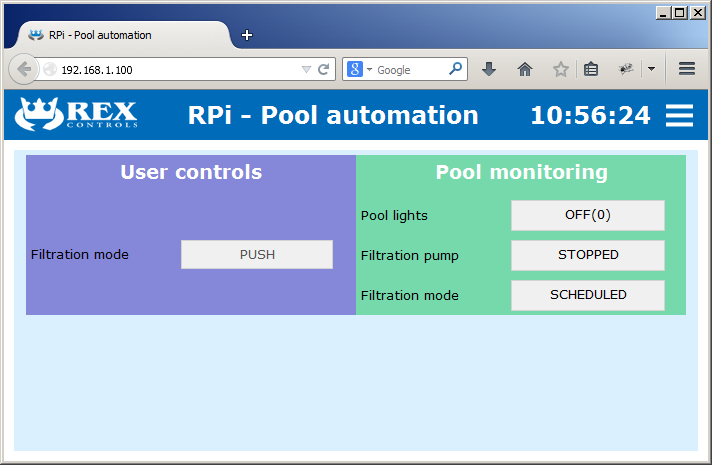
- If you can see the clock ticking and there are no errors then everything is set up correctly. This is the most basic type of web-based HMI of the REX Control System. It is composed from simple Buttons and Displays, hence the name WebBuDi.
- During the scheduled intervals for pool filtration, you will see the filtration pump running.
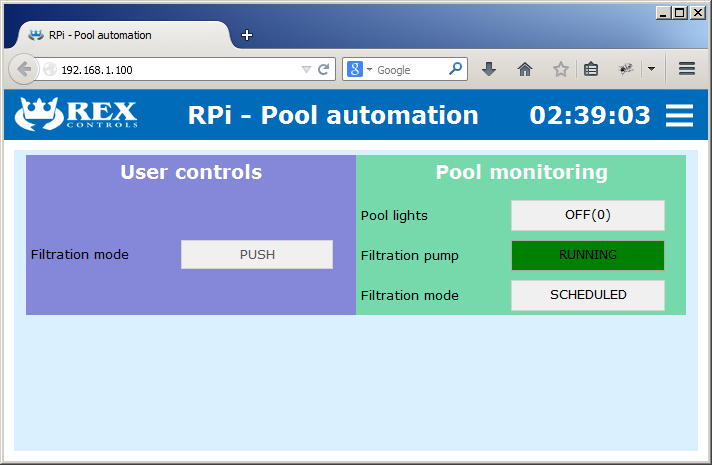
- Now you can push the button, which will disable filtration until you press the button and enable it again.
- The button is connected to the MP_BUTTON function block, which you should remember from the previous tutorial. It controls the RS_NOFILTER flip-flop function block, which you can watch in RexView and RexDraw simultaneously and observe the effect of pushing the button.
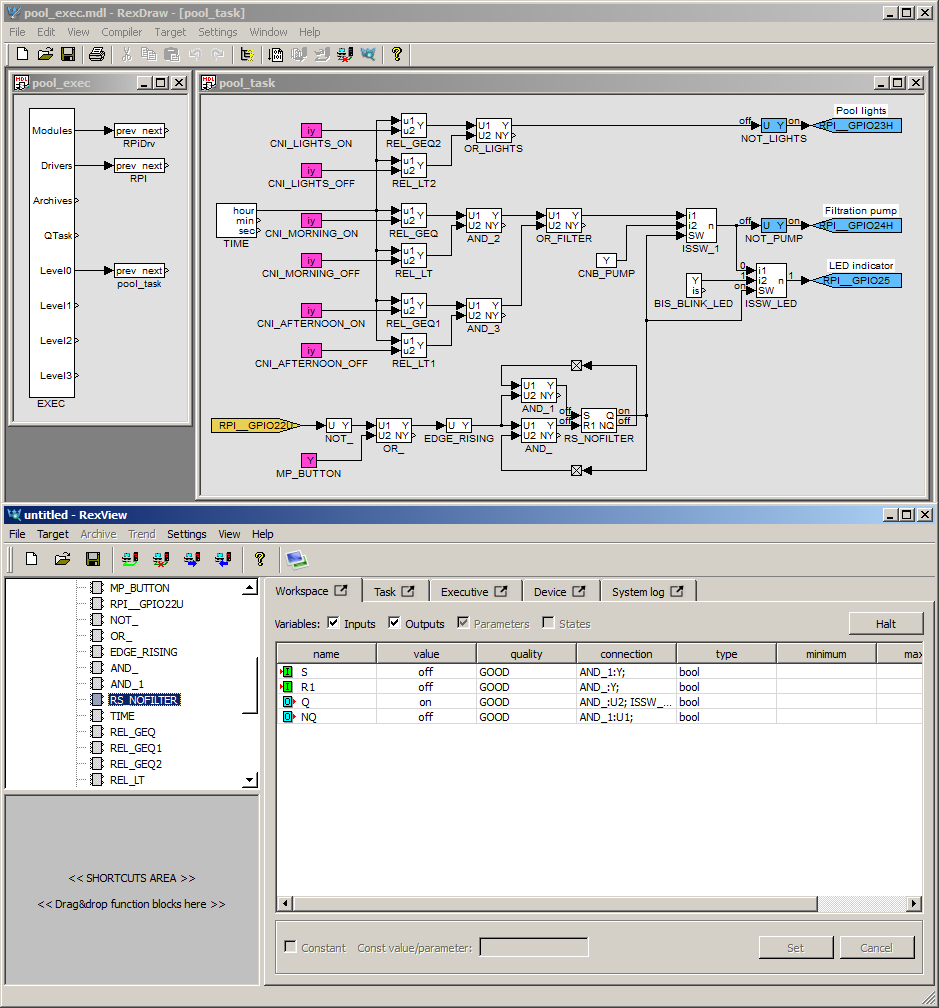
- Also try pushing the physical button which is wired to your Raspberry Pi.
Modifying the WebBuDi HMI
- In order to modify the HMI, you need to edit the index.html file in the HMI subfolder of the pool automation project. Simply open the file in your favourite code editor (not MS Word!). The index.html file is the only one which you need to edit.
- You can see some header and footer in the file but you are interested only in the document.ready function where the individual elements of the HMI are defined.
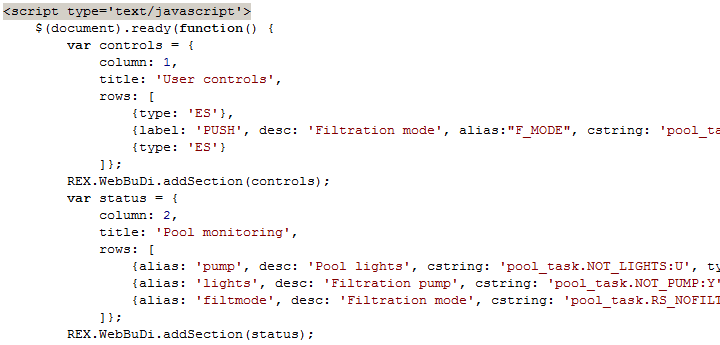
- As you can see, the HMI consists of two sections named controls and status. Each section has a title and contains rows of buttons and displays.
- Each line in the rows array represents one element in the HMI screen. The definition of each element contains a unique alias, description, the so-called connection string and type definition.
- The connection string is in fact a path to the parameter or signal in the REX control algorithm. E.g. the connection string pool_task.NOT_LIGHTS:U refers to the U input of the NOT_LIGHTS function block inside the pool_task algorithm.
- The most common elements are:
- DR - Digital Read
- DW - Digital Write
- AR - Analog Read
- AW - Analog Write
- MP - Manual Pulse
- ES - Empty Space
- Each element has also additional properties which control its appearance but we will not list them here. Instead we encourage you to explore the code yourself and also to inspect the HMIs in the other examples in our repository.
- Once you are done modifying the index.html file, simply repeat the procedure of downloading the HMI folder to your Raspberry using RexView and refresh the webpage in your browser.
Beyond the scope of this tutorial: A complex WebBuDi HMI for PiFace Digital
An example of more complex WebBuDi visualization is included in the Demo Example for PiFace Digital. See the video which illustrates the possibilities of the WebBuDi HMI and the REX Control System:
Is there any way to create graphical HMI instead?
Yes, there is! Check out our RexHMI extension for Inkscape, which allows you to create a stunning HMI for your project.
Troubleshooting
Got stuck at any point? We want to hear about it, do let us know.
Additional information
You can also:
- Read the Getting started guide and watch our Getting started video which both explain a PID control loop example.
- Explore the rich function block library of the REX Control System.
- Visit the Raspberry Pi Foundation webpage, where you can find more information about the Raspberry Pi minicomputer.
Raspberry Pi is a trademark of the Raspberry Pi Foundation.
updated: 2017-05-19


